So, for me, it is summer break and I am working. With this being said I have decided to start another book to occupy my time. Much like my last book, this will end up being a photo album, only this time it will be all of my own work.
Wednesday, May 28, 2008
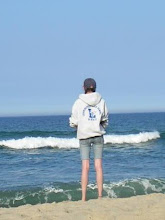
Trip to the Beach
A few days ago I found myself surf-casting with my dad. Although it rained for a bot and was windy, I was able to take a few photos.


Thursday, April 24, 2008
The Best Part
The best thing about these altered photo albums is that they are personal, unique, not very time consuming and make amazing gifts. For a gift you can even set a theme; the photos that went into this book were photos of my friends and I through the years. This is just one thing you can do with your book.
A few things from the book:
* To hold the photos in I used sticky photo corners- I used the black ones for this book but the colored ones work too! (I personally do not like the clear ones that come on a roll I find they do not stick very well)
* One other note about my book: The book no longer closes all of the way. By gluing the pages together and adding photos you expand the book; if this is not a problem for you you can leave it, if you want your book to close all of the way this can be remedied by using a utility knife or excato to cut some of the pages out, just make sure you cut as close to the binding as possible as to not get ridges.
Good Luck and Have Fun!!
Tuesday, April 22, 2008
Cover Art
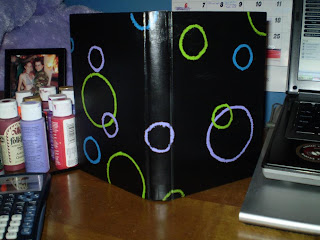
Now that the inside of the book has been altered, it is time to update the cover!
For this book I simply painted the whole cover black and then created bubbles.
 (Painted cover)
For this book I simply painted the whole cover black and then created bubbles.
 (Painted cover)
(After the cover dried I used a clear spray paint to seal it and give it a nice shine!)
Sunday, April 20, 2008
More Pages!
Here are the rest of the pages in order of appearance in my book:

(Here I used a single coat of blue paint, this allows you to still see the words somewhat)
 (These are just some bubbles)
 (These are just some bubbles)
(For this one I used a thin purplish paint to color the pages, then used the non-bristled end of my paint brush to add the dots)

(Just some stripes white mixed with red and a little black and black mixed with a little red and white)
 (Again, I just mixed some colors- blue and grey)
 (This is one of the inside covers)
 (Here is the other inside cover. I used the thin purplish color so you can still see the original art from the book.)
Wednesday, April 16, 2008
Now, the fun part!
Now, I get to paint and design the backgrounds for each page! This part is where you can be as simple as you wish- or go crazy and explore!
Here are the first few pages:

(This page I just painted purple, then went back with little amounts of paint and essentially poked the page to smudge the grey around.)
 (This was done with the same dabbing motion only I did not paint the page first.)
 (Here I just painted a swirl.)
Here are the first few pages:

(This page I just painted purple, then went back with little amounts of paint and essentially poked the page to smudge the grey around.)
 (This was done with the same dabbing motion only I did not paint the page first.)
 (Here I just painted a swirl.)
Tuesday, April 15, 2008
It begins...
Just last night I began work on my next project book. I am turning and old hardcover child's book into an altered photo album.
 This is my old ready-to-be-altered book.
 To start, I sectioned off the pages to make several thicker pages, these will be the photo pages!
To do this:
1) Get some white glue and a paintbrush
2) Glue some pages together- glue as many as you want for each page (in this one I used about 10 pages each)
3) As you glue, use clothes pins to keep any glue that oozed out from making the other pages stick together.
Ta-da!! Your book is prepped and ready for art!
Subscribe to:
Posts (Atom)