Thursday, February 28, 2008

I Found Nemo

In my never ending rummaging through my belongings and my house in general, I have run across an abandoned and unfinished piece.

Having been stuffed behind the couch, this project went forgotten for, well, I can't remember how long; maybe it was junior year in high school?

Either way, I am excited to begin to finish this piece. Being one of my largest pieces- roughly 2ft on each side- it will give me a chance to expand my use of color and just make a big mess!


Stay tuned for updates and many more photos.

P.s. I cannot remember why I punched holes around the border but I will probably be covering them.

Sunday, February 24, 2008

Return of childhood


As an avid Muppet and Henson fan, I often find some Muppet-like critters popping up in my work. While digging through some photos and the like on my computer I once again found myself staring into the faces of Elmo and a snow angel (played by a family member and myself respectively). As a child, what more could you want: marching in a parade with Elmo, escorted by a firetruck and firefighters? After all, it was like two childhood dreams coming to life. (Photo by Ethan)

Thanks to a former Australian forum buddy, Grover and Ollie (an Australian Muppet) found their way into one of my altered books along with my stuffed Stitch.

Whoever said you needed either paper or a canvas has never been faced by the challenges of being a high school student with no money, in a school that did not treat the arts as well as anyone would hope. Outside of my books, a great many of my pieces are on cardboard. Not only is it sturdy and will not curl with a wet medium, it is also cheap and easy to find!

One of my favorite and most useful projects was painting discontinued tiles that were "rescued" before they went out to the trash. Not only are tiles unique, but given enough clear spray paint (I use it religiously to seal my work) they make durable coasters that can double as conversation pieces.
And in Honor of the Late-Great Jim Henson I leave you with some of his quotes:

" The only way the magic works is by hard work. But hard work can be fun."

"Life's like a movie, write your own ending. Keep believing, keep pretending."

"My hope is to leave the world a little better for having been there."

Wednesday, February 20, 2008

Fun with the Sun

So you think that paint is the only way to show the sun?
Well, think again, especially in an altered book.
Ahh, tissue paper, no longer just for little kids.
Here, I once again glued a bunch of pages together and cut out the cactus, the spines/wolves are made out of cardboard (sorry, the picture doesn't show it too well)

Friday, February 15, 2008

Happy (late) Valentines Day

In honor of the passed Hallmark holiday, I will give you a step-by-step way to make a mini-mosaic homemade card.

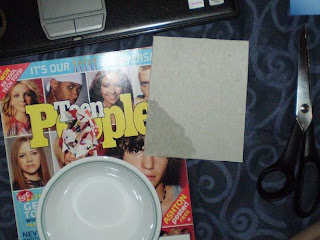
Needed materials: heavy card stock (or a cereal box), drawing paper (or any heavy paper), two sided tape, school glue, old magazines.

To start off: cut the card from the cereal box, draw out the outline then cut it out. Once you have your basic card shape, use double side tape or glue to hold a piece of heavy paper inside, this will give you a nice clean surface to write your note on (it also covers up the ink if using a cereal box).

Next: Cut the spare paper off and square your card. Now is you chance to trace out the design or shape for the cover of the card.


Now for the fun part: go through old magaizes that you have laying around and cut out sections of whatever colors you will need. For this card, I chose red and pink, so as i flipped through the pages I cut out sections of red and pink.
*TIP*: do not just use the same shade of a color, mix darks and lights and different patterns.
Once you have gathered these color segments, cut them into small pieces, roughly 1/4 inch, they do not have to be squares, make whatever shapes you want making sure they have straight edges (curves are hard to work with).


Mix a little bit of water in a bowl with glue. Make sure there is more glue than water. Using your fingers or a brush, paint the card with the gluey mix and place your colored pieces to the card. It is easier if you work from the edges in, outline your shape and the card boarder first.

The corners will begin to curl up when the pieces are placed in the watery mix; do not panic!! All you have to do is take a little more of the mix and brush over the corners, using your fingers pat down any other corners that are sticking up.

Once you have filled in all of the cover let it dry. Once dry you can brush the mix over the top again to make sure all pieces stay glued down; or, as I like to do, take clear spray paint and spray the card cover. This will seal the card keeping all pieces secured and will add a little bit of shine.

When all has dried- TA-DA- your card is ready for a lovely message!

This is one of my favorite mediums to work with, it is fun, relaxing, and best of all easy and messy! Enjoy!

Tuesday, February 12, 2008

Getting Artsy

When creativity starts to flow, why bother hiding it? Explore new styles, new supplies, and old art projects...


Yes, I did sit there and stitch in all of those beads. It was a great way to use up some spare time!

Monday, February 4, 2008

Photos, Photos, Everywhere

...but where to put them?!?


Find a stack of old pictures? Don't know where to put them or how to display them? Stick them in your altered book!

Altered books don't have to be just artsy and abstract. A lot of my pages look more like scrapbook pages, only "altered." Sometimes the pictures are just shown in spreads with little knick-knacks added here and there. While other times I will cut different shaped windows in to a bunch or pages and put the photo in the window between the pages.


Here is a page that uses windows. To make windows, I hot glue the outer edges of a section of pages together. This makes one big thick section or page. From there I cut the shape out of the many layers; one the layers have all been cut, insert the photo. Finally, glue the top few pages in the stack together to keep the edges from curling over time.
For this page, I merely folded a series of pages and painted each a different color. Once all was dry, I added my photos.

This page is more of a scrapbook-like page. Nothing fancy, just some little items and decorations to accompany the photos. However, instead of selecting paper to mount it all on, I painted it to my liking.